Hotspots are interactive markers you place directly on a 3D model. Click one and the camera flies in, the popup appears, and you can chain hotspots into a guided tour for storytelling, product walkthroughs, or training content.
How to add #
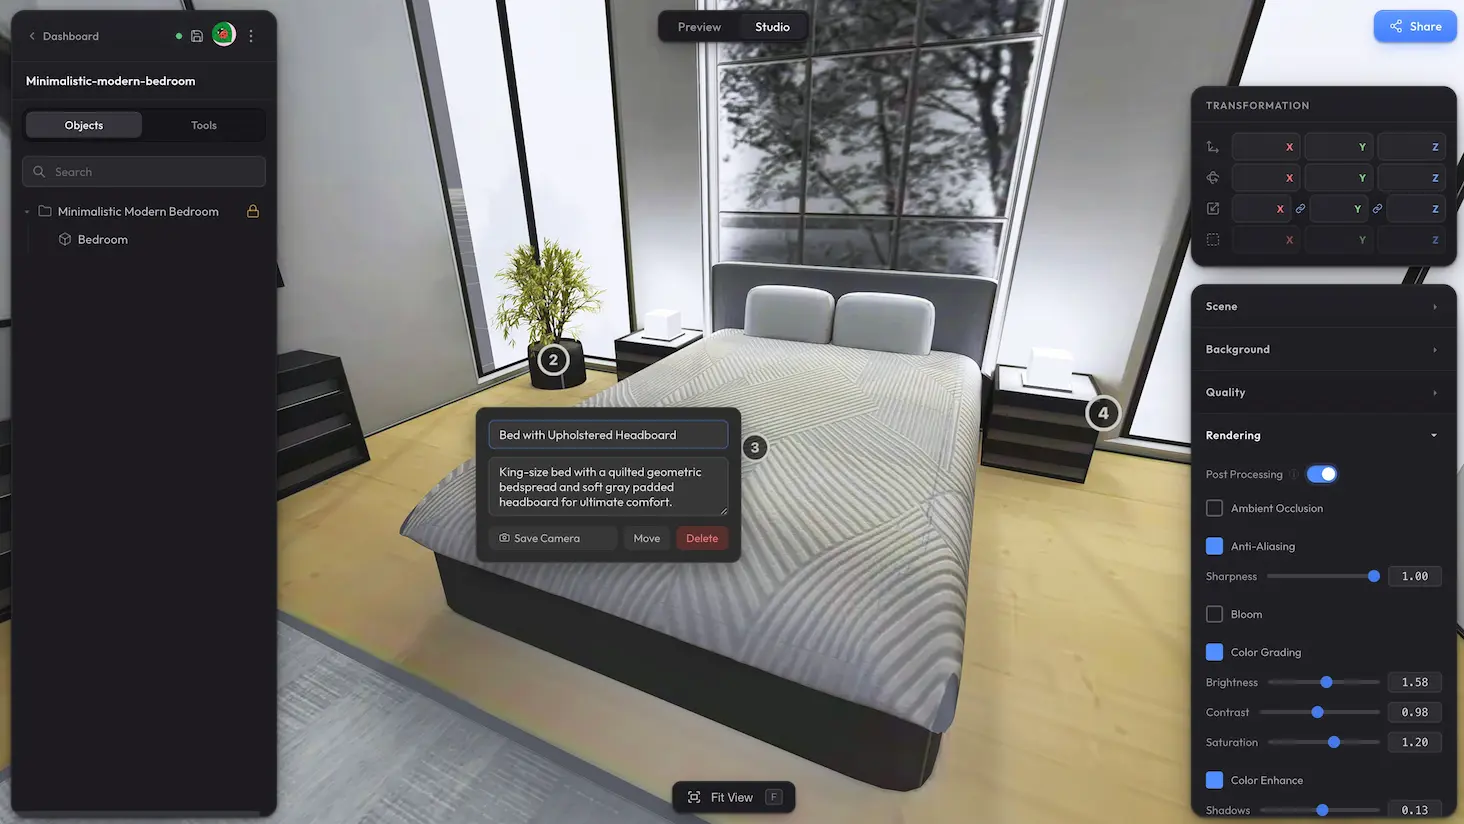
In Studio, switch to the Tools tab in the left panel. Expand Hotspots and click Add Hotspot, then click on the model surface where the marker should appear.
Editing a hotspot #
Click any existing hotspot to open its editor.
The editor lets you:
- Title — short label shown at the top of the popup.
- Description — body text shown below the title.
- Save Camera — captures the current view; when this hotspot is opened later, the camera flies back to this angle.
- Move — the hotspot starts pulsing; click anywhere on the model to relocate it.
- Delete — removes the hotspot.
Guided tour #
The Guided Tour checkbox in the Hotspots panel is on by default. Open Preview mode and you will see a small navigation panel with prev/next arrows that steps the camera through your hotspots in order.
Letting viewers hide hotspots #
In Viewer features, the Hotspots checkbox adds a toggle button to the viewer — your audience can use it to show or hide all hotspot markers themselves.
See it in action #
Click any marker in this scene to see hotspots and the guided tour in action.
Need something custom? #
Need different marker styles, more advanced camera behaviour, or integration with your own UI? Drop us a line at hello@trice3d.com or join our Discord and tell us what you need.
.webp)